How to Tell if Ac Capacitor is Bad- Here’s How to Spot the Signs!
The air conditioning system is a complex piece of equipment that relies on various components to function correctly. One such crucial component is the AC capacitor. It plays a vital role in powering the compressor and fan motors. Eventually, if your AC unit is not performing as it should, the culprit could be a bad AC capacitor.
But how to tell if your AC capacitor is bad and needs replacement?
Well, in the section below, we have discussed the signs of a failing capacitor, their testing methods, and preventive measures to keep your AC system running smoothly.
Keep reading to know the full details.
Signs of a Bad AC Capacitor
The first step in diagnosing the problem is recognizing the symptoms of a failing AC capacitor. Here are some signs that your AC capacitor might be on its last legs:
# Delayed Start (Compressor not starting): If your AC unit takes longer than usual to turn on after you’ve adjusted the thermostat, it could indicate a weak capacitor. The capacitor provides the compressor with the initial burst of power it needs to get going.
# Humming Sound: When an AC capacitor goes bad, it may produce a persistent humming or buzzing sound, especially when the compressor is running.
# Intermittent Operation: A failing capacitor can cause your AC unit to turn on and off intermittently or run erratically. This is because the capacitor is unable to provide the required voltage consistently.
# Reduced Airflow: If you notice a significant decrease in the airflow from your vents, it could be a sign that the capacitor can no longer power the fan motor correctly.
# Tripping Circuit Breaker: A bad capacitor can cause the circuit breaker to trip frequently, especially when the compressor is trying to start up.
# Blowing Warm Air: When the capacitor isn’t functioning correctly, your AC may blow warm air instead of cool air.
# Visible Signs of Damage: A visual inspection might reveal a swollen, bulging, or leaking capacitor.
# Burning Smell: If you notice a burning odor coming from your AC unit, it could be a sign of an overheating capacitor.
# Higher Energy Bills: A malfunctioning capacitor can cause your AC to work harder, increasing energy consumption and higher utility bills.
How to Test an AC Capacitor
After you find any clue that your AC capacitor might have a problem then you can perform some tests to confirm your suspicions. For testing the ac capacitor, you must be cautious because working with electrical components can be dangerous if you have no basic knowledge about them. Therefore, it will be wise to call a professional HVAC technician. For those who want to attempt the testing process, here’s a step-by-step guide:
Step 1: Safety First: Turn off the power to your AC unit at the circuit breaker and wait for at least 30 minutes to allow any residual charge in the capacitor to dissipate.
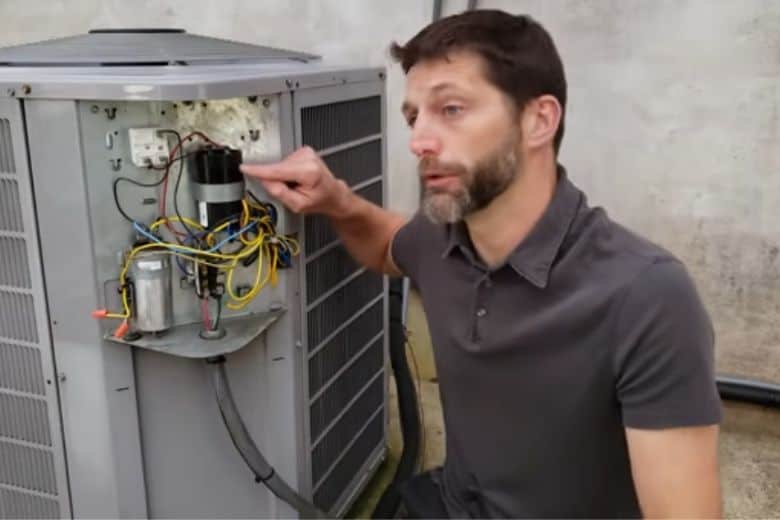
Step 2: Locate and Remove the Capacitor: Locate the AC capacitor, which is usually located inside the AC unit’s electrical panel. Use a screwdriver to remove the capacitor from the board.
Step 3: Visual Inspection: Check for any visible signs of damage, such as bulging, leaking, or a deformed casing.
Step 4: Set the Multimeter: Set the multimeter to measure capacitance. Place the red probe on the capacitor’s positive terminal and the black probe on the negative terminal—the capacitance setting (usually denoted by the letter “F” for Farad).
Step 5: Discharge the Capacitor: Capacitors store electrical energy, which can be dangerous if not discharged. To discharge the capacitor, a screwdriver with an insulated handle is used to touch the two terminals simultaneously.
Step 6: Test the Capacitor: Touch the multimeter probes to the appropriate terminals on the capacitor. Compare the reading to the capacitor’s rated value, which should be printed on its side.
Step 7: Read the Multimeter: The multimeter should give you a reading of the capacitor’s capacitance. If the reading is within 6% of the capacitor’s rating, the capacitor is functioning correctly. If it is lower than 6%, the capacitor is faulty and needs to be replaced. For more straightforward knowledge, the capacitor is likely wrong when the capacitance reading is significantly lower than the rated value.
Step 8: Repeat the Test: For dual capacitors, repeat the process for each set of terminals.
Note:
Even if you’ve discharged the capacitor, always handle it cautiously, as it can still hold a charge.
Do I Need to Change the AC Capacitor, or Can I Fix the Problem?
In most cases, a bad AC capacitor cannot be repaired and must be replaced. Capacitors are sealed units, and their internal components are not serviceable. Attempting to fix a capacitor can be dangerous due to the high voltages involved and is not recommended.
If your tests confirm that the capacitor is faulty, replacing it with a new one is the best course of action. When selecting a replacement, choose a capacitor with the same voltage and microfarad (μF) rating as the original. It’s crucial to match these specifications precisely to ensure the proper functioning of your AC system.
While replacing a capacitor is relatively straightforward for those with some electrical experience, it’s often best to leave this job to a professional HVAC technician. They have the necessary tools, knowledge, and experience to safely replace the capacitor and ensure that your AC system functions correctly afterward.
How to Prevent AC Capacitor Failure
While it’s impossible to prevent capacitor failure completely, you can take steps to minimize the risk and extend the life of your AC system:
1. Voltage Regulation: Ensure your home’s electrical system provides stable voltage. Fluctuations can stress the capacitor and other components.
2. Avoid Frequent Cycling: The AC unit’s frequent on/off cycling can shorten the capacitor’s lifespan. Try to avoid setting the thermostat to a temperature that causes the system to cycle too often.
3. Proper Sizing: Ensure your home’s AC unit is sized correctly. An oversized or undersized system can lead to short cycling, which stresses the capacitor.
4. Regular Filter Changes: Clean or replace your AC filters regularly. Clogged filters can cause the system to work harder, putting additional stress on all components, including the capacitor.
5. Professional Installation: Always use a qualified HVAC professional to install a new AC system. Proper installation can prevent many future issues.
6. Quality Components: Opt for high-quality parts from reputable manufacturers when replacements are necessary. While they may cost more upfront, they often last longer and perform better.
7. Seasonal Preparation: Have your AC system inspected and serviced before the start of each cooling season. This can catch potential issues before they become serious problems.
8. Monitor System Performance: Pay attention to any changes in your AC unit’s performance, such as reduced airflow or increased energy consumption. These can be early warning signs of a failing capacitor.
9. Replace at Recommended Intervals: Even if your capacitor is still functioning, it’s a good idea to replace it every 5-8 years as a preventative measure. Capacitors can degrade over time, even if no apparent issues are present.
Final Words
A bad AC capacitor is the culprit behind a wide range of performance issues with your air conditioning system. If you notice and understand the signs of a failing capacitor, then test it and take immediate action. You can help prevent unexpected breakdowns and extend the life of your AC unit.