Ge Washing Machine Leaking from Bottom
Are you tired of finding puddles of water on your laundry room floor? You often face this issue if you own a washing machine leaking from the bottom. But what causes the leak? And more importantly, how can you fix it?
In this blog post, we will explore the common reasons why a ge washing machine leaking from bottom. Besides, provide you with practical solutions to resolve the problem.
We have focused on this washing machine brand due to its enormous inquiry.
Although GE washing machines are known for their reliability. But, naturally, even the best appliances can encounter issues over time. When it comes to a leaking machine, there are a few possible culprits. It could be a problem with the water inlet valve, the drain pump, or a faulty hose connection. Our article will delve into each of these potential causes, offering a concise overview of the reasons your GE washing machine might be leaking from the bottom.
Possible Causes of a GE Washing Machine Leaking from the Bottom
Very first, let’s explore the possible causes of a leaking GE washing machine. By identifying the underlying issue, you can tackle it effectively.
1. Faulty Hoses
Inspect the hoses connected to your washing machine. The hoses connect your washing machine to the water supply. Over time, hoses can become loose or develop cracks, leading to leaks. Besides, it can b be worn or damaged, which can also cause leaks.
2. Faulty Water Inlet Valve
One of the primary culprits behind a leaking washing machine is a defective water inlet valve. This valve controls the flow of water into the machine. If it malfunctions, it can lead to leaks.
3. Damaged Water Pump
The water pump is responsible for circulating water during the washing process. In case the pump becomes damaged or develops a leak. It can cause water to leak from the bottom of the machine.
4. Overflowing Tub
Overloading the washing machine can cause the tub to overflow. As a result, the water starts leaking from the bottom. Ensure you’re following the manufacturer’s guidelines for loading cloth.
5. Damaged Tub Seal
Generally, the tub seal is responsible for preventing water from leaking. With time it can wear out or become damaged due to regular use or excessive detergent residue. If this seal fails, it can leak water from the bottom of the machine.
6. Faulty Drain Pump
The drain pump removes water from the machine during the spin cycle. Water may leak from the bottom if it becomes clogged, damaged, or malfunctions.
7. Loose Connections
The connections between various washing machine components, such as the water inlet and outlet valves, can become loose or disconnected. This can lead to water leakage.
8. Excessive Detergent Use
Using too much detergent or the wrong type can create excessive suds and lead to leaks. It’s important to follow the manufacturer’s guidelines for detergent usage.
9. Damaged Door Seal or Gasket
A damaged or worn-out door seal or gasket can leak water during the wash cycle. Inspect the seal for any signs of tears, cracks, or deterioration. If you identify any damage, replacing the seal can resolve the problem.
10. Clogged or Defective Drain Pump
A clogged or defective drain pump can cause water to accumulate and leak from the bottom of the washing machine. Check the drain pump for any obstructions or signs of damage.
Effective Solutions for a Leaking GE Washing Machine
Now that we have identified potential causes. Now see the possible solutions to address the problem of a leaking GE washing machine from the bottom.
1. Check and Clean the Water Inlet Valve
- Begin by turning off the water supply to the washing machine. This ensures no water flows during the inspection and cleaning process.
- Locate the water inlet valve at the back of the washing machine. It is usually connected to the inlet hoses that bring water into the machine.
- Carefully disconnect the inlet hoses from the water inlet valve. Use pliers or an adjustable wrench to loosen the connections. Be careful not to damage the hoses or the valve.
- Inspect the water inlet valve for any signs of damage, cracks, leaks, or corrosion. Pay attention to the valve body, solenoids, and electrical connections. If any damage is found, it may be necessary to replace the valve.
- To clean the water inlet valve, use a soft brush or cloth to remove debris or sediment that may have accumulated. Gently scrub the valve and its components to ensure proper functionality.
- Pay attention to the valve screens or filters. These can become clogged with sediment that affects water flow. Remove the screens or filters and rinse them under running water to remove any trapped debris.
- Once the valve and its components are clean and free from debris. Reassemble the valve by reconnecting the inlet hoses. Be sure the connections are tightened securely but avoid over-tightening.
- Turn on the water supply and check for any leaks around the connections. Tighten as necessary.
- Test the washing machine by running a short cycle to ensure that water flows into the machine properly and without any issues.
- If the water inlet valve continues to malfunction or show signs of damage after cleaning, it is advisable to consider replacing it with a new one. Consult the manufacturer’s instructions or seek professional guidance on acquiring and installing a replacement valve.
Note:
Checking and cleaning the water inlet valve periodically helps maintain proper water flow and prevents potential issues such as low water pressure or interrupted cycles. A clean and functional water inlet valve ensures the efficient performance of your washing machine.
2. Replace the Door Seal or Gasket
- Before starting the replacement process. Ensure that the washing machine is unplugged from the power source for safety.
- Carefully examine the door seal or gasket for any signs of damage. Such as tears, cracks, or mold growth. Suppose the seal is damaged or worn out. In that case, it is important to replace it to maintain the machine’s efficiency and prevent water leakage.
- To remove the damaged door seal or gasket. Follow the manufacturer’s instructions specific to your washing machine model. You must loosen any retaining clips or screws that secure the seal.
- Once the old seal is detached. Next, thoroughly clean the area around the door to remove any dirt, debris, or residue. It will ensure a clean and proper installation of the new seal.
- Install the new door seal or gasket. Carefully align it with the grooves or channels around the washing machine door. Follow the manufacturer’s instructions closely to ensure correct installation.
- Take care to secure the new seal in place properly. Reattaching any retaining clips or screws that were removed during the removal process. Double-check that the seal is aligned evenly and snugly against the door opening.
- After replacing the door seal or gasket, plug the washing machine back into the power source.
- Run a test cycle without any laundry to ensure the seal is functioning correctly. Check for any signs of leaks or improper sealing during the cycle.
Note:
By replacing a damaged door seal or gasket, you can maintain a watertight seal and prevent water leakage from the washing machine. Proper alignment and secure installation of the new seal are crucial for your appliance’s optimal performance and efficiency.
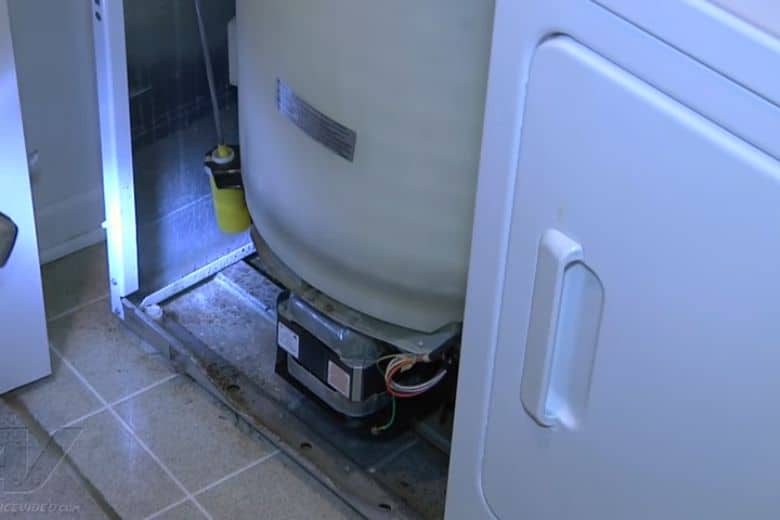
3. Clear the Drain Pump and Check for Defects
- Remove the access panel at the back of the washing machine to gain access to the internal components.
- Locate the water pump. It is responsible for circulating and draining water during the washing cycle.
- Check the water pump thoroughly for any signs of leaks. Besides, check such as water stains or puddles around the pump area.
- Examine the connections of the water pump to ensure they are tightly secured. Look for any loose or detached hose or wires affecting the pump’s functionality.
- Inspect the water pump for any visible damage, such as cracks, dents, or excessive wear. These issues can impair the pump’s performance and may require replacement.
- If you notice any leaks, loose connections, or visible damage on the water pump. It is recommended to replace the pump. Consult the manufacturer’s instructions or a professional technician for guidance on acquiring and installing a new water pump.
4. Inspect and Replace Damaged Hoses
- Start by turning off the water supply to the washing machine and unplugging it from the power source for safety.
- Carefully examine the hoses connected to the washing machine. Look for any cracks, leaks, or visible signs of damage along the length of the hoses.
- If you notice any loose connections, use pliers or a wrench to tighten them securely. Ensure the connections are snug but not overly tightened to avoid damaging the fittings.
- In the case of damaged hoses, you need to replace them with new ones. Damaged hoses can lead to leaks. Therefore, may result in water damage or inefficient operation of the washing machine.
- To replace the hoses, first, turn off the water supply valves. Disconnect the damaged hoses from the washing machine and the water supply valves.
- Take the damaged hoses to a hardware store or appliance repair shop for suitable replacements. Ensure that the new hoses match the specifications of your washing machine model.
- Install the new hoses by connecting one end to the water supply valves and the other end to the appropriate inlet connections on the washing machine. Make sure the connections are tight and secure.
- Once the new hoses are properly installed, turn on the water supply valves and check for leaks. Run a short test cycle to ensure the washing machine operates without issues.
Note:
Inspecting and replacing damaged hoses is crucial to prevent water leaks. Moreover, it helps to maintain the proper functioning of your washing machine. Regularly checking the hoses and promptly addressing any damage or leaks. It will help prolong the lifespan of your appliance and prevent potential water damage in your home.
5. Use the Correct Amount of Detergent
- Refer to the manufacturer’s instructions for the recommended detergent dosage.
- Avoid using excessive amounts of detergent to prevent overflowing and leaks.
- Consider using high-efficiency (HE) detergents for better results.
Frequently Asked Questions
Can I repair a leaking washing machine myself?
Answer: Depending on the severity of the issue, you may be able to perform some repairs yourself. However, it is advisable to consult a professional if you’re unsure or if the problem persists.
Why is it important to address a leaking washing machine promptly?
Answer: Ignoring a leaking washing machine can lead to further damage to the machine and potentially cause water damage to your home.
How can I find a professional technician to repair my washing machine?
Answer: You can search for authorized service centers or technicians the manufacturer recommends. Alternatively, ask for referrals from friends or family who have had positive experiences with appliance repair services.
Final Words
Dealing with a leaking GE washing machine can be inconvenient and a hassle. But you can resolve the issue if you understand the common causes and follow the troubleshooting steps. Remember to perform regular maintenance and take preventive measures to keep your GE washing machine running smoothly and leak-free.