
How to Check Ammonia Level in Rv Fridge
When you want to maintain the optimal performance of an RV fridge, it’s fundamental to check its ammonia level often. Besides, it is also necessary before you plan to travel or want to live in your RVs.
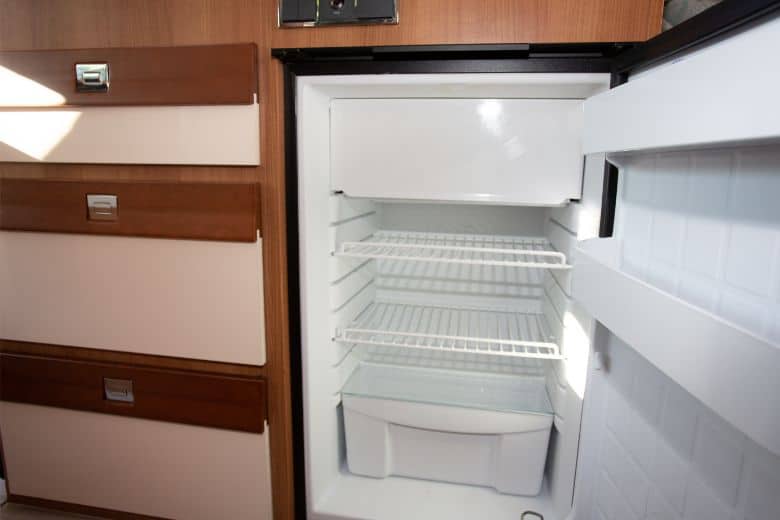
Because ammonia is a crucial component in the cooling process of an RV fridge. RV refrigerators typically operate on an absorption cooling system, which relies on ammonia as the primary refrigerant. This system absorbs the heat inside the refrigerator, effectively cooling the contents.
But what happens when the ammonia level in your RV fridge goes awry? Neglecting this can lead to inefficiency and potential hazards.
Don’t fret; we’re here to guide you on how to check ammonia level in the RV fridge. Let’s explore the details.
How to Check Ammonia Level in RV Fridge
Contrary to what you might think, ammonia is essential to your RV fridge. The ammonia refrigeration system, like the magic behind the scenes, keeps everything excellent. But sometimes, like a bad apple, it can start misbehaving. In that situation, you need to take immediate action. We have shown you step by step process. Have a look!
Gearing Up: Tools You’ll Need
Let’s not put the cart before the horse – first, you’ll need some tools. Here’s your checklist:
- A Screwdriver
- An Ammonia Detection Kit
- Safety Gloves
- Nose Plugs
- Eye wear
Caution: Always remember safety first!
Step 1: Safety Precautions
Before starting any maintenance procedure, take safety precautions. Remember to turn off the power supply and disconnect it from the electrical source. Additionally, wear protective gloves and eyewear to safeguard yourself throughout the process.
Step 2: Locate the Access Panel
Next, locate the access panel on the exterior of your RV fridge. The access panel provides access to the refrigerator’s components, including the cooling unit where the ammonia resides.
Step 3: Remove the Access Panel
Carefully remove the screws securing the access panel using a screwdriver or the appropriate tool. Once the screws are removed, gently take off the panel, exposing the cooling unit and other internal components.
Step 4: Visual Inspection
Start by visually inspecting your RV fridge for any leaks or unusual smells. It can give you an initial indication of high ammonia levels.
Step 5: The Smell Test: Trust Your Nose
You know how they say, “If something smells fishy, it probably is”? If your fridge smells like a cleaning product aisle, you might have an ammonia leak. But, how do you tell for sure?
Step 6: The DIY Ammonia Detection Method
An old saying goes, “If you want something done right, do it yourself.” With your ammonia detection kit, follow the instructions to a tee. These kits usually involve using test strips and waiting for a color change. Don’t jump the gun; patience is a virtue!
Step 7: Interpreting the Results: Don’t Cry Over Spilled Ammonia
If the test strips change color, you’re dealing with an ammonia leak. Keep your cool! Don’t panic, ventilate your RV, and avoid using open flames.
Step 8: Using Leak Detection Solutions
To accurately detect a leak, apply a leak detection solution or soapy water to the cooling unit’s tubes. Bubbles will form if there’s a leak.
Step 9: Professional Assistance: When to Call in the Cavalry
Sometimes, even the most experienced DIYers need a helping hand. If you’re not confident in your ammonia-detecting skills or the situation seems dire, don’t hesitate to call a professional.
Note: The Good, The Bad, and The Ammonia
Ammonia is a fantastic refrigerant, but, like a double-edged sword, it can be hazardous. Handling ammonia requires knowledge and respect for the substance.
Signs of an Ammonia Leak in Your RV Fridge
To keep your fridge running efficiently, you must be vigilant about the signs of an ammonia leak. Here are some indicators that your RV fridge might have an ammonia issue:
1. The Smell of Ammonia: If you detect a strong smell of ammonia near your fridge, it is a clear sign of a leak. It’s essential to address this immediately, as ammonia can be harmful.
2. Yellow Residue: A yellow residue outside the fridge or at the back of the cooling unit is another sign of an ammonia leak. The yellow precipitate is the dried ammonia, an indicator that you need to check the ammonia levels.
3. Poor Cooling Performance: If your fridge isn’t cooling as efficiently as it should, it might be due to a low ammonia level.
Signs of High Ammonia Levels
- Unusual Smells: A strong, pungent smell is one of the first signs of high ammonia levels. If you notice a distinctive odor around your RV fridge, it’s time to check the ammonia levels.
- Leaking Fluids: Another sign is the presence of yellowish-green liquid around the base of your fridge. It could indicate a leak in the cooling system, leading to high ammonia levels.
Preventive Measures
- Regular Maintenance: Regular maintenance of your RV fridge can help prevent high ammonia levels. This includes cleaning the cooling unit and checking for any potential leaks.
- Proper Usage: Ensure you’re using your RV fridge correctly. Avoid overloading it and ensure its level when in use. It can help maintain the balance of the cooling system and prevent high ammonia levels.
Frequently Asked Questions
How often should I check the ammonia levels in my RV fridge?
Answer: As a rule of thumb, check the ammonia levels in your RV fridge at least twice a year. However, if you smell ammonia or hear strange sounds, check it immediately.
Can I use an available ammonia test kit to check my RV fridge?
Answer: No, using an ammonia test kit specifically designed for RV fridges is essential. These kits provide accurate results for the unique cooling system of an RV fridge.
What are the dangers of ammonia leakage?
Answer: Ammonia leakage can lead to respiratory issues, skin irritation, and in severe cases, can be fatal.
Can high ammonia levels affect the food in my RV fridge?
Answer: High ammonia levels can lead to inefficient cooling, affecting your food’s freshness. However, the ammonia is contained within a closed system and should not come into contact with your food.
Is there an alternative to ammonia refrigeration?
Answer: Yes, there are alternative refrigerants like hydrofluorocarbons, but ammonia is preferred due to its efficiency.
How can I prevent ammonia leakage in my RV fridge?
Answer: Regular maintenance and inspections are key to preventing ammonia leakage. Keep the coils clean and ensure the seals are intact.
Can I repair a leaking RV fridge myself?
Answer: While minor issues can be fixed with a DIY approach, a leaking fridge often indicates a severe problem. It’s best to seek professional help in such cases.
Final Words
Understanding how to check ammonia level in Rv fridge is an imperative skill for any RV enthusiast. It ensures its efficient operation and safety. By being aware of the signs of high ammonia levels and knowing how to check them; you can ensure your RV fridge remains in top-notch condition. Remember, prevention is always better than cure, so regular maintenance and proper usage are critical.

2 Comments